Hi there mate! This will be the last discussion on OSPF configuration. The rest of the OSPF topics will discuss how OSPF works and the content of Hello packet. The last topic that we had was configuring passive interfaces for security reasons. This time, we will configure OSPF with authentication using encrypted passwords. The need for configuring authentication is very simple, it is to provide security to active interfaces. I mean active interface are those interfaces that receives and sends hello or OSPF updates. They cannot be a passive interface so authentication will be the best process to secure those interfaces.
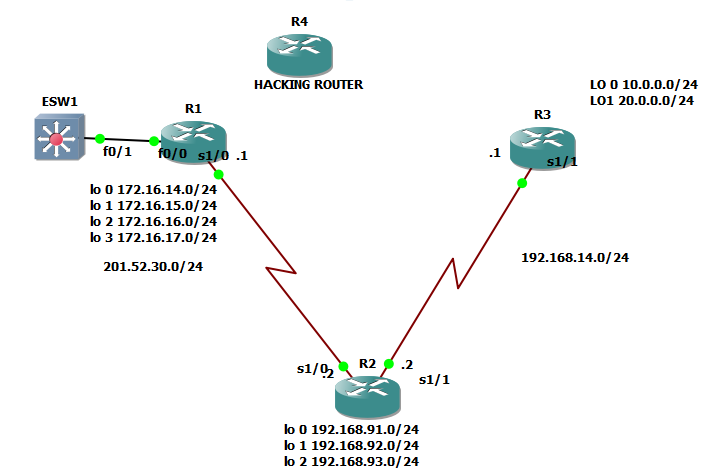
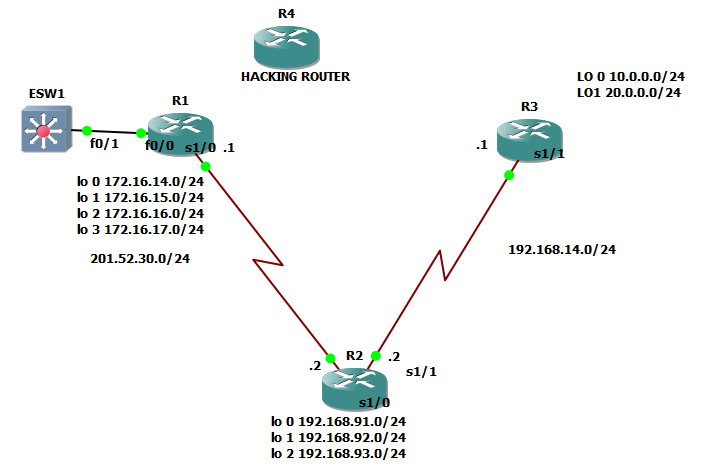
Just come to imagine the scenario below wherein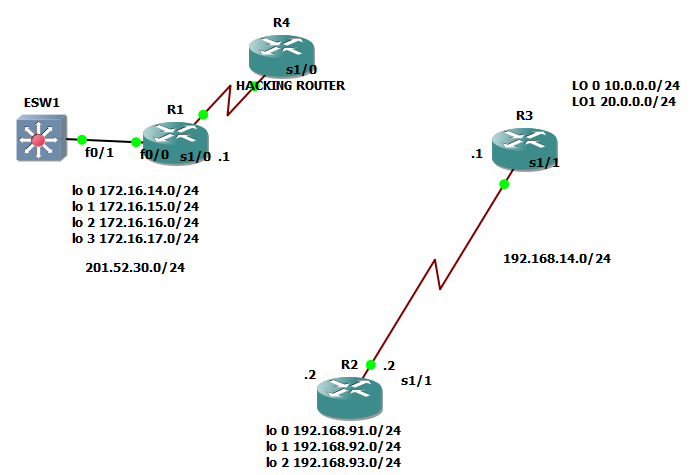
Instead that the interface serial 1/0 of router 1 is connected to router2. It was connected to hacking router so it will lead to security breach.
So let us get back to our original topology.
Authentication SYNTAX:
en
conf t
router ospf {process#} <— process #
area {area#} authentication message digest < — we set authentication on the entire area on specific router
exit
int serial x/x
ip ospf message-digest-key 1 md5 {password} <— the authentication used is MD5 , you can further check on google how it works
Note: 1.) We set password on each interface since the security breach may happen on each interface
2.) We can set multiple passwords on each interface: the syntax will follow:
int serial x/x
ip ospf message-digest-key 1 md5 {password}
ip ospf message-digest-key 2 md5 {password}
Very easy configuration right? So let us try to check the configuration on each router.
en
conf t
router ospf 100
area 0 authentication message-digest
exit
int se 1/0
ip ospf message-digest-key 1 md5 cisco

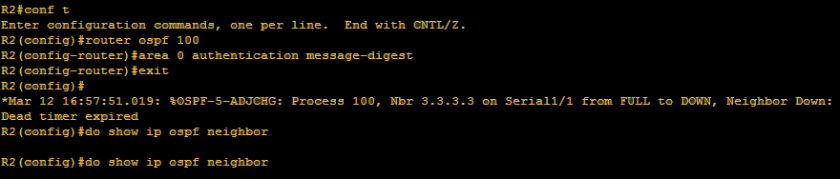
As we can see, opsf neighbor adjacency went down. It is for the reason that the neighbor router is not also configured with authentication and so they will not established neighbor relationship. Another way to verify: show ip ospf neighbor

So no neighbor relationship established. We can now continue with R2 authentication configuration:
@r2
en
conf t
router ospf 100
area 0 authentication message-digest
exit

As I go on, I can see that neighbor adjacency went down even without configuring the interfaces. It is for the reason that authentication was configured globally so it affects all the interfaces involved. We need to go by interfaces so that it would be more secured and to specify the password. How we will enter a locked door without a key? There should be a key. We need to specify the password / key-string. Below shows that no neighbor adjacency was established.
Let us continue the configuration:
int se 1/0
ip ospf message-digest-key 1 md5 cisco
int se 1/1
ip ospf message-digest-key 1 md5 cisco
exit
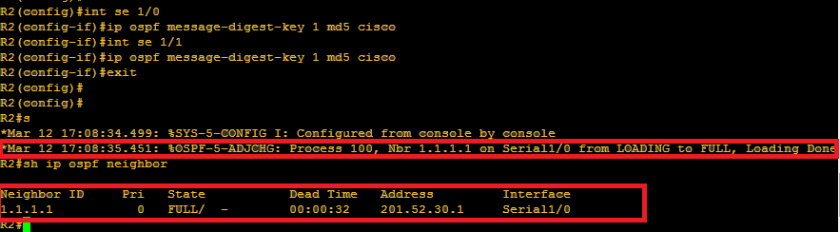
Below is what happened when I configured authentication on R2. We can see that serial 1/0 went up since it is connected to R1 and R1 has already md5 configuration. We can see on neighbor table that only R1 exists since R3 doesnt have md5 configuration.
Below is the neighbor table of R1, it shows that he can now see R2

Lastly, let us configure R3:
en
conf t
router ospf 100
area 0 authentication message-digest
exit
int se 1/1
ip ospf message-digest-key 1 md5 cisco
exit

Nothing much special with R3 configuration. We already discussed that serial 1/1 is possible to turn up since all routers has already md5 authentication and also router 2 appears on neighbor table. One thing that I can add to is that you alway see that term “from loading to FULL”. Those are stages of neighbor adjacency which we will discuss on the next topics.
I guess right now, you wonder how ospf works? We will discuss that on the next topic.